How to Bench Press 101
Learn how to bench press properly, from start to finish. It is a complicated lift, in order to perform it correctly you should know all the steps involved in heavy bench press. Once mastered, you will be able to get out of the poverty bench press zone and apply the principles to other lifts.
“Building strength takes time. There are no short cuts. So, lift properly and safely. You will lift longer and stronger!”- Linas Valuckas
The Warm Up | Positioning | How should I grip? | The Arch of War | Breathing | Bar Path and Tension | Tips and Tricks | Dangers of Bench Press | Common Mistakes
Basics of Bench Pressing
1. The Warm Up
As silly as you might find it, warming up is the most important part of the bench press workout. If you don’t do it well or if you skip it completely and jump to training straight away, you will get injured. You might get away with it a hundred times but as the weights get heavier, you are increasing the risk of injury significantly.
Every warm-up will be different, it all depends on your fitness level and the end goal of the workout. But let’s talk bench press, not just pumping up the chest before hitting the discos. I am talking benching some serious weight. There are four steps of the warm-up before a bench press workout.
Loosen up
After sitting the entire day in the office or spending the whole day digging trenches, chances are your muscles or muscle groups are going to be tight. This is where a foam roller comes in handy. Start off with your lower back and then hit every section of your legs including glutes and hip flexors.
Get your heart rate up
Increased heart rate will pump some extra blood to your muscles, but don’t overdo it. It has to be light. Warmed up muscle will be easier to stretch.
Do some dynamic stretches
The main difference between dynamic and static stretches is that you do not hold the stretch at any point during the movement. It must be a continuous action. If you do hold a stretch, it might have a negative impact on your performance.
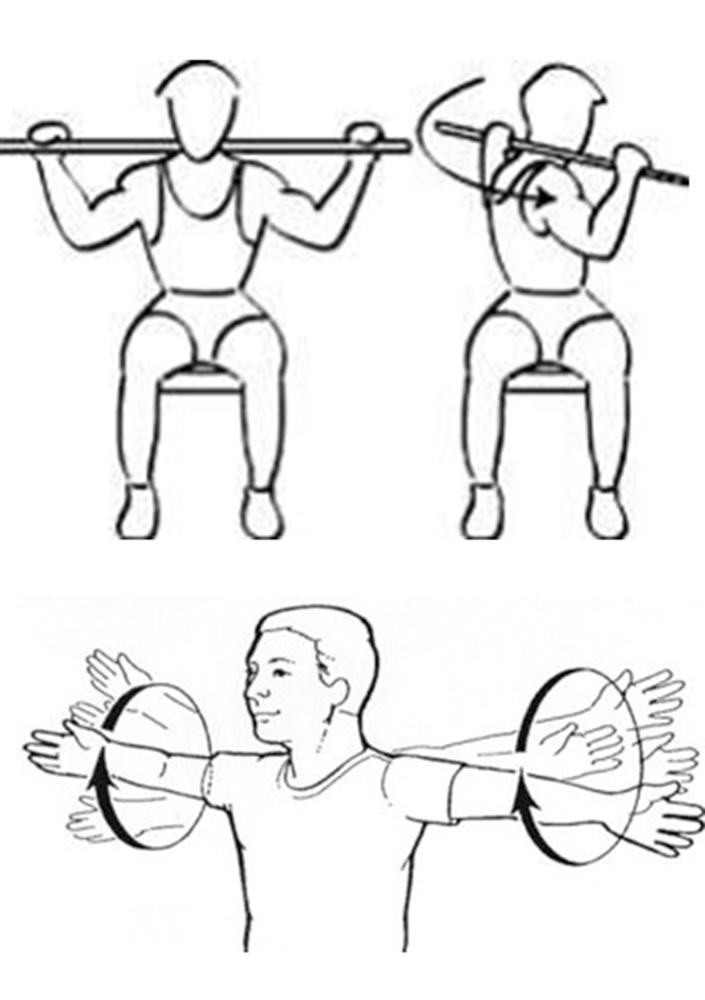
My favourite warm-up is head to toes. Start off by moving your head in a circular motion and then move to your wrists, elbows and shoulders. Ideally, you would warm up your rotator cuffs using a resistance band, a couple of microplates in your hands or just by yourself.
Lift your arm up at a 90-degree angle and then move your arm forward to around the chest line and then back to the starting position while your elbow stays in the same position.
Next thing on the list is your hips. You don’t need to shake your hips like Shakira, but to move them around in a circular motion. This will loosen up your hips.
Moving on, it is now time to warm up your knees and ankles by moving them in a circular motion. You can also touch your toes and then reach for the sky, but don’t jump—that would be considered as cardio and we don’t need that in this workout.
Practice, then practice some more
Start off by positioning yourself on the bench and doing 10-15 reps with an empty bar (depending on your fitness level). Try to perform the movement in the correct form. Practising the movement correctly will help you to develop muscle memory with the correct form.
It takes me up to 6 sets until I move up to a weight which is close to my max. The warm-up itself might take up to 45 minutes. It might seem like a long time for a warm-up, but you should know that I haven’t had any serious injuries in my career as a powerlifter, over 8 years and counting.
2. Positioning
Now that we learned how to warm up we can move to the next stage, which is positioning.
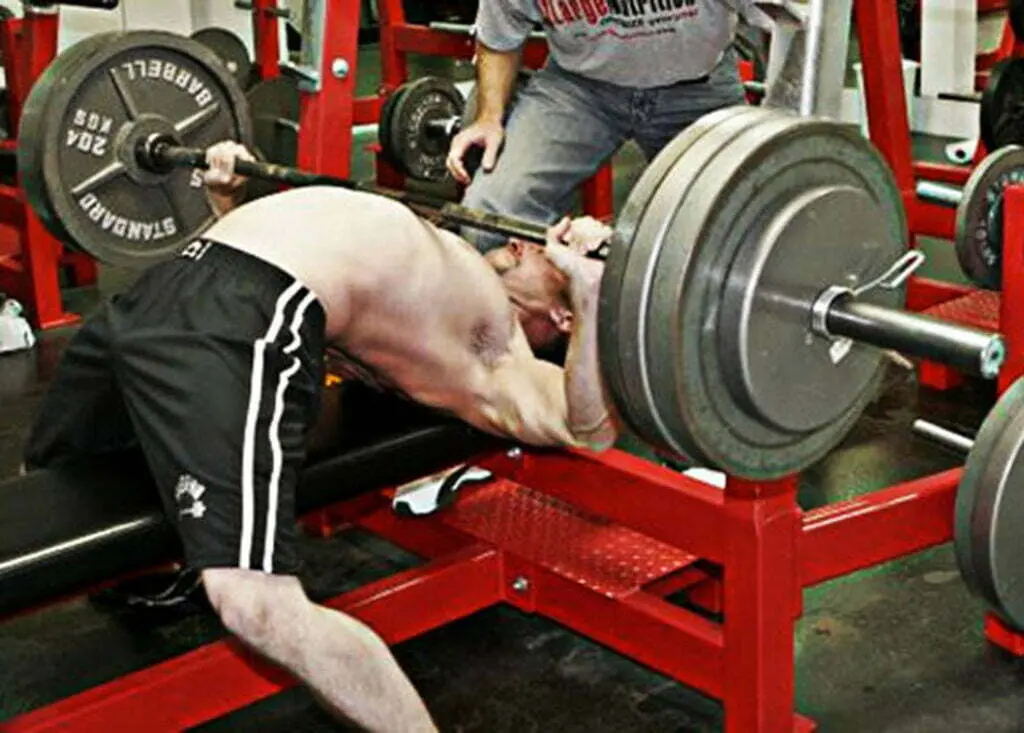
First things first, when you lay down on the bench, try to position yourself so that your eyes would be directly below the bar. If you don’t have a spotter you can move a bit backwards as it will be easier to unrack the barbell. This prevents your shoulders from being in an awkward position.
The reason behind your eyes being directly below the barbell is that you won’t hit the power rack uprights even if you lose form during the lift. Feet position does matter, and it can have a massive impact on your bench press. Ideally, your heel would be behind the knee, just like me in the photo.
Make your body as strong as you can – from your feet to your fingers. Supporting heavy weight requires a strong platform.This will allow you to have a proper leg drive as well as maintain your arch if you have any. I will reveal my secrets of Arch of War in a few moments.
Grip the barbell and squeeze it hard. This will “activate” your shoulders. Gripping the barbell intensely will signal to your body that it is about to be subjected to heavy weight. If you don’t do this, the weight will immediately start to drop once you rack.
3. How should I grip?
In training, you would have three different types of grips – narrow, medium and wide.
Narrow grip is ideal for triceps work as you would work through the whole range of the triceps. You would do this exercise if you are struggling to move the barbell from around 2/3 of its path. That is where your triceps kick in and help you to lock out the lift. We do not bench that way in competitions or when going for your personal best.
Medium grip is a grip which creates a 90-degree angle between your forearm and your upper arm. For most of us, it would be our pinkie finger on the inside of the knurl mark. Medium grip concentrates more on triceps. If you have strong triceps, this would be your strongest grip.
Wide grip is not for beginners. The last thing you want is to load the barbell up and go heavy. That would be a recipe for a torn pec. The wider the grip is, the more of the weight is going to be concentrated on your chest, the closer grip positions hit the triceps.
The sole reason behind the wide grip is to bench more weight. Because the arms are not vertical, your body will be forced to compensate elsewhere, specifically your chest. I particularly like this grip as it helps me to get heavier weight off my chest. The first 1/3 of the lift is basically just my chest and then my triceps kick in and next thing I know, I have a new personal best.
I would suggest widening your grip slowly over a longer period of time. Just move one finger over the knurl marking until you find the most comfortable grip.
4. The Arch of War
To be completely honest, I do not understand why people hate the arch so much. It’s like there’s some kind of stigma around it. Arch is essential to a big bench press. Not only will you have a lesser range of motion, but you will also prevent rotator cuff injuries.
What happens when you are benching flat on your back is once you bring the barbell down to your chest, your rotator cuffs have very little room to move. This restriction of movement increases the risk of dislocating your shoulder or risk shoulder impingement.
The arch will give your shoulders that additional room you need to complete the lift.
I am not talking about the two-inch bench press arch, but a slight or medium arch where you still use your chest to bench rather than breathing in and out and completing the lift.
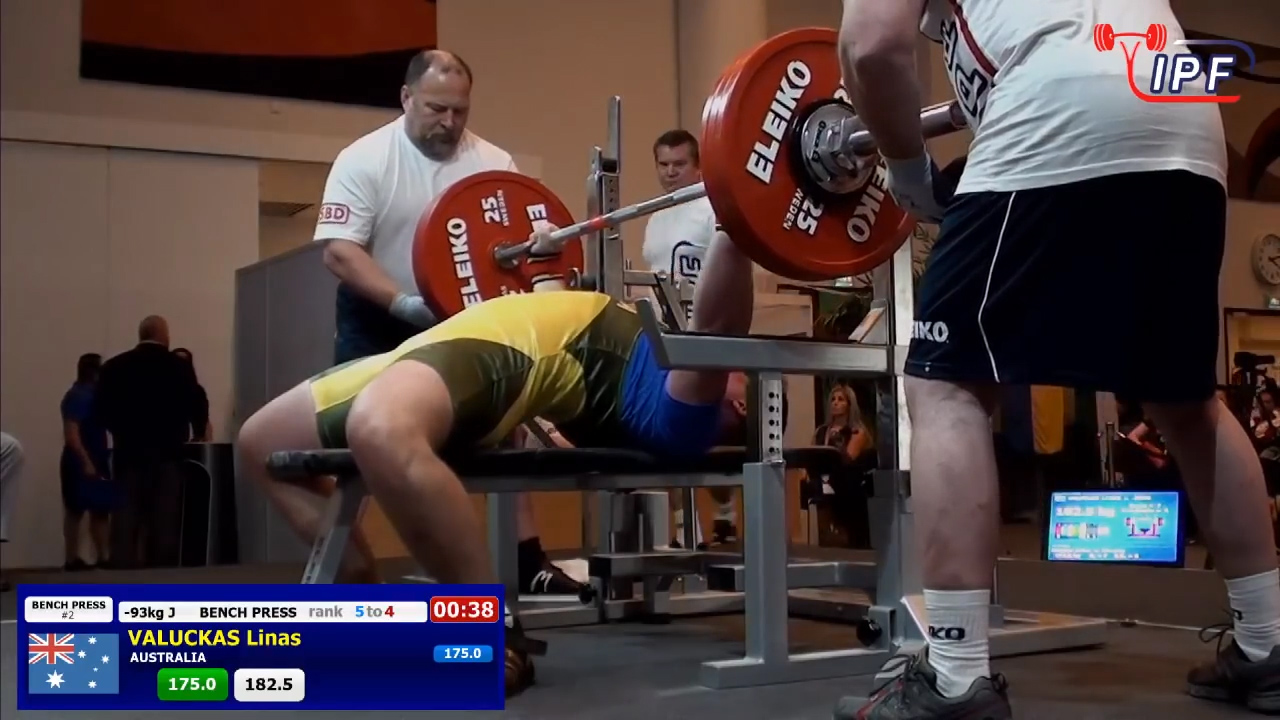
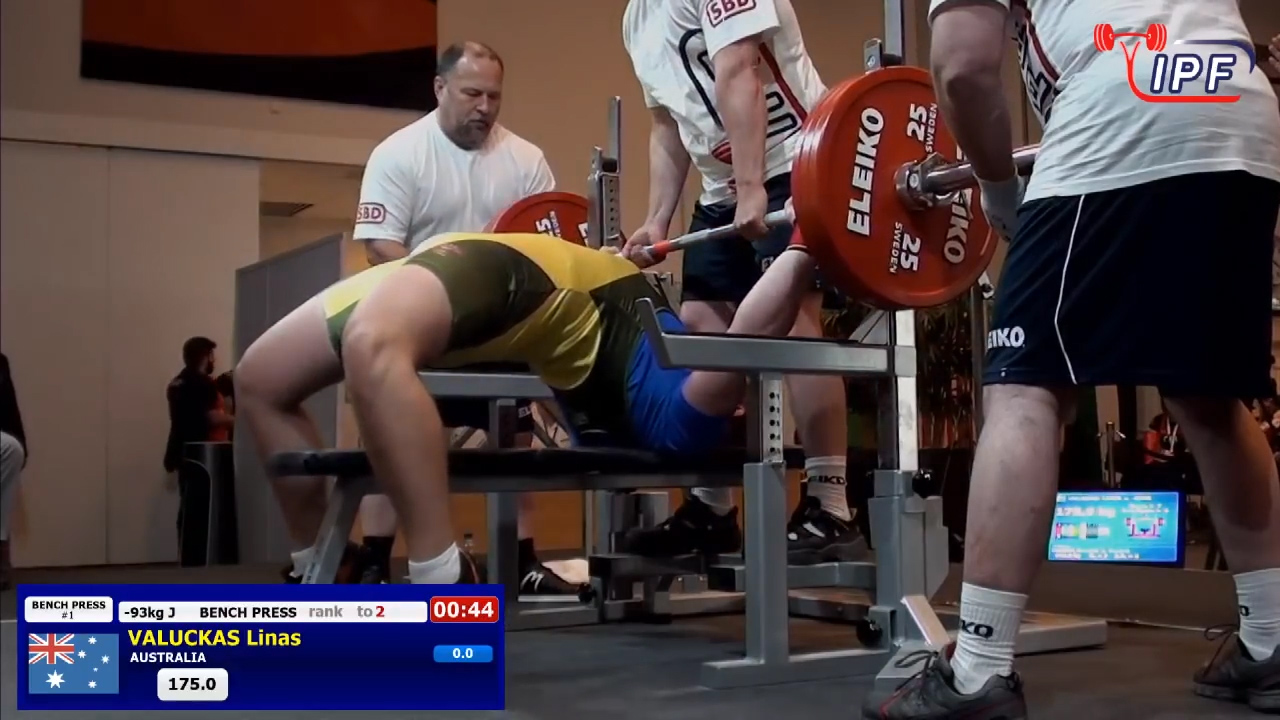
I thought it would be easier to reveal my bench press secrets and set up form if we had a photo. I’ll break it down step by step to show what happens when I set up for the bench:
Step one – I lay down on the bench with my eyes directly below the barbell. I grip the barbell, clench my shoulders together and push them down, pushing my chest up in the process (remember that the arch comes from the upper spine, not your lower back).
Step two – I bring my heels back and then I step using my toes and bring my hips up. In the process, I squeeze the barbell, activating my shoulders, preparing for the lift and push myself down with the barbell to prevent myself from slipping backwards.
Step three – I unrack the barbell, balance it and bring my hips down and I adjust my heels, so they would be flat and I would be ready for the lift.
That is all the magic behind my arch. Of course, there are more things involved in the bench press than the arch itself.
5. Breathing
It might sound silly, but most of the athletes do not know how to breathe when benching. I’ve always been taught to breathe out during the harder moments. In this case, it is when the barbell is moving upwards. I would breathe in while I am lowering the barbell and breathe out when it is coming up. That wasn’t a really great technique.
Why? Well, it is fairly simple, you are the soft point between the barbell and the bench and if you are soft, chances are you will struggle to control the barbell when benching.
So how do I breathe? When you unrack the barbell and prepare for the lift, as I explained before, you would breathe in before starting the lift and keep the air in until you have finished the lift.
This way you will be able to control the barbell throughout the whole lift.
6. Bar Path and Tension
Can I bench yet? Yes and no. There are a few more tricks you should know before you can move bigger weights.
So, we know how to warm up, choose our grip, arch and breathe. But what is missing is the bar path and tension.
First, the bar path. Each person is different. Some of us are shorter or have longer limbs, different shoulder widths and muscular development. All of these things play a major role in the bar path. If you lower the bar too far from the perfect spot, whether it is forward or backwards, you won’t have nearly as much strength as you would if you hit the right spot. Now how do we find it?
For me, personally, it is in the middle of the chest, just above the nipple line. But because we are built differently, yours can be a bit further or a bit back. That is why we start with low weight so we can find the most comfortable position at the bottom of the movement.
If you practise enough with low weight, your body will develop muscle memory and you will be able to bench a perfect lift even with a heavy weight on the barbell.
As your grip varies, chances are that the barbell position on your chest will change as well. It is good to always start with low weights until you learn how to hit that perfect spot every time with your new improved grip width.
Try to keep your forearms in front of the barbell. This way you will be able to stabilize the barbell much easier and won’t waste your precious energy.
Tension would definitely make my top 5 list of the most underused preparations for the lifts.
As I mentioned before, you are the soft point between the barbell and the ground. This can be applied on the big three lifts (squat, bench press, deadlift). You tense your entire body before you begin the lift.
Of course, after you unrack, you wait for the command to lift (if you are competing).
Either way, just stop for a fraction of a second, breathe in, tense all the muscles in your body (don’t forget the abs and legs). And then push.
When you are benching, push your feet to the ground but do your best to keep your hips on the bench as it is very easy to lose contact. This way you will utilise every muscle in your body to get a bigger bench press.
If you are not warmed up properly, you might get a muscle cramp. Plenty of times I didn’t warm myself up properly only to have my lift spoilt by a hamstring cramped.
Sounds crazy to have a bench press ruined by a cramp in your leg, but serious benching really does require the use of every muscle in the body.
7. A few tips and tricks
Well, you already know about my cheating arch. But there is more.
I’ve read and actually heard from personal trainers that your wrist is supposed to be straight when you are benching. That is wrong on so many levels. You might get away with it while you are warming up but once you move to a heavier weight, it will become a problem.
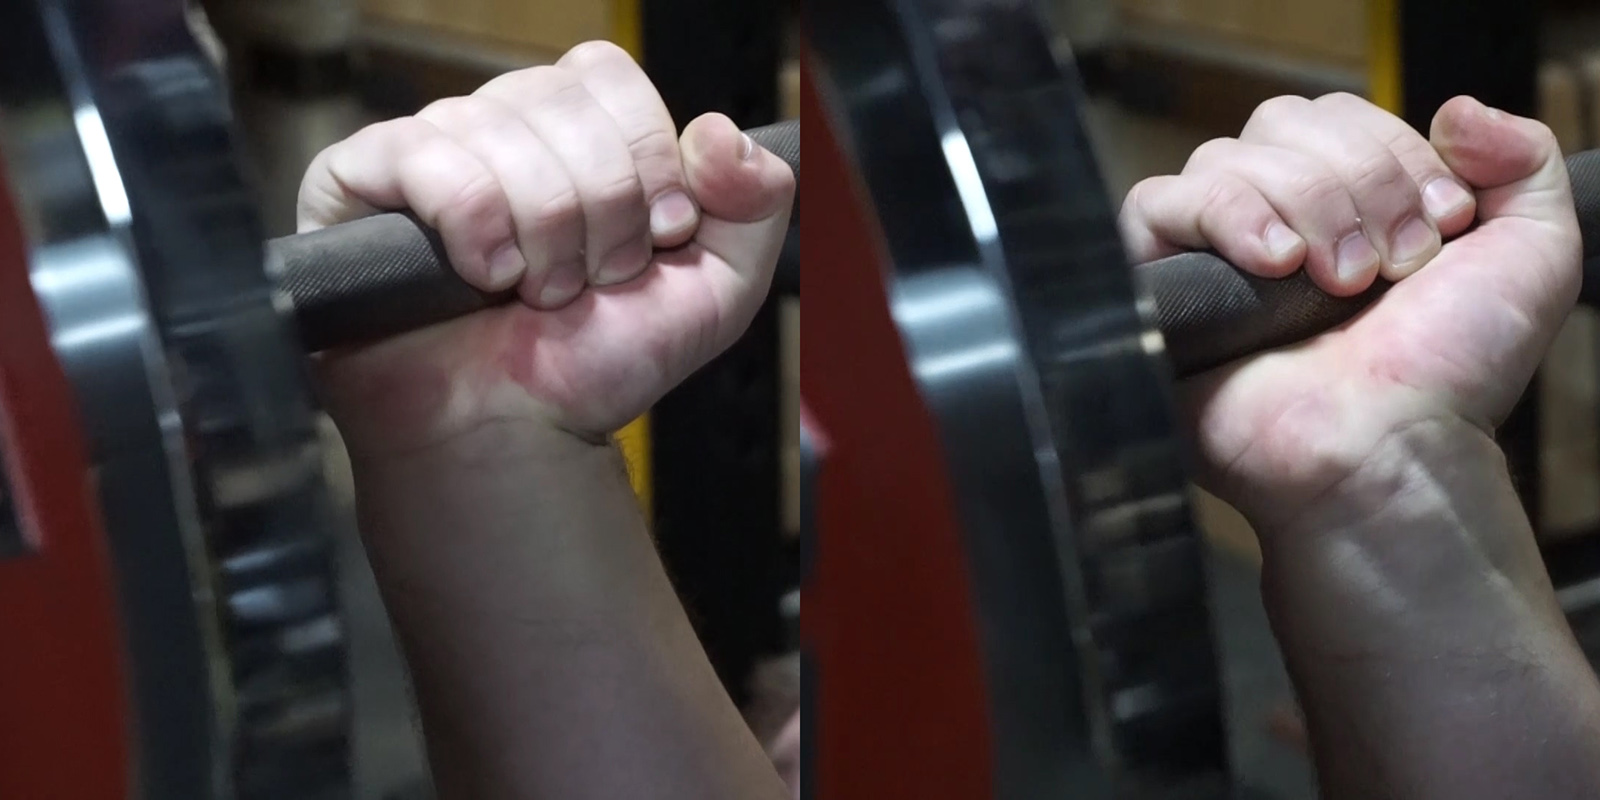
When your wrist is straight, your barbell is basically resting on your thumb and your tendons are fighting really hard to keep it in that position. If you go heavy enough, they will give up and what happens next?
Your wrist tips forward, and if you are not using spotter bars, arms or a spotter, the barbell will end up on your chest, if you are lucky. I always use wrist wraps when I got past 150kg. That is the limit where I am still comfortable to bench without them.
The barbell is supposed to sit in the middle of the palm or a bit backwards. This way you will be able to reduce the risk of injury and, at the same time, shorten the range of motion throughout the whole movement.
Paused bench press. It is easy to lower the bar on your chest. The hard part is always lifting it up! Have you ever tried pin press? This is when you start the bench press at the bottom of the movement (on the spotter arms) and lift the bar up. This eliminates any bounce or momentum.
Well, people are doing a similar thing when doing a paused bench press. They basically place the bar on their chest and let it rest there until they hear the lift command. This is not an efficient way of lifting.
What worked for me was when I lowered the bar to my chest but kept the tension at all times.
Remember you have to touch the chest and the referee will give you the command when the bar stops moving. Rather than letting it sink into your chest, just touch the chest and hold the tension. As soon as the bar stops moving you’ll get the command and you will be able to lift the bar much easier.
8. Dangers of Bench Press
Bench press is the most dangerous lifts out of the big three (squat, bench press and deadlift). You can drop the barbell when squatting or deadlifting but if you drop the bar when you are benching it won’t be pretty.
Incorrect form can lead to shoulder injuries such as dislocation or impingement, as well as torn pecs. My tip is to always put the form first and, if you can’t complete the lift with correct form, either try again or lower the weight.
9. Common mistakes
Chances are you will have to make some serious adjustments to your bench press, whether it’s breathing, warming up or feet position. I assure you, if you do everything correctly, you will be able to bench more.
Stop listening to the gym bros and find out what works for you. Each of us is built differently so what is perfect to them might not be so great for you.
Once you have mastered the form and the “Art Of Arch” and all the little tricks, you will be able to enjoy the bigger bench press.
Number one rule is to focus on your form rather than trying to lift more than you can think you can lift. Most of the time when you go heavy, your form suffers because of one simple reason – your body will compensate by activating other muscle groups trying to complete the lift.
Building strength takes time. There are no short cuts. So, lift properly and safely. You will lift longer and stronger!